Configuring Arista Switches
with Ansible, Part 3 of 3
This article is part three of my series on Configuring Arista Switches using Ansible (the first two parts can be found at Part1 and Part2, respectively). In this article, I am going to discuss some troubleshooting techniques for the Arista-Ansible setup.
As a reminder from Part1 of this series:
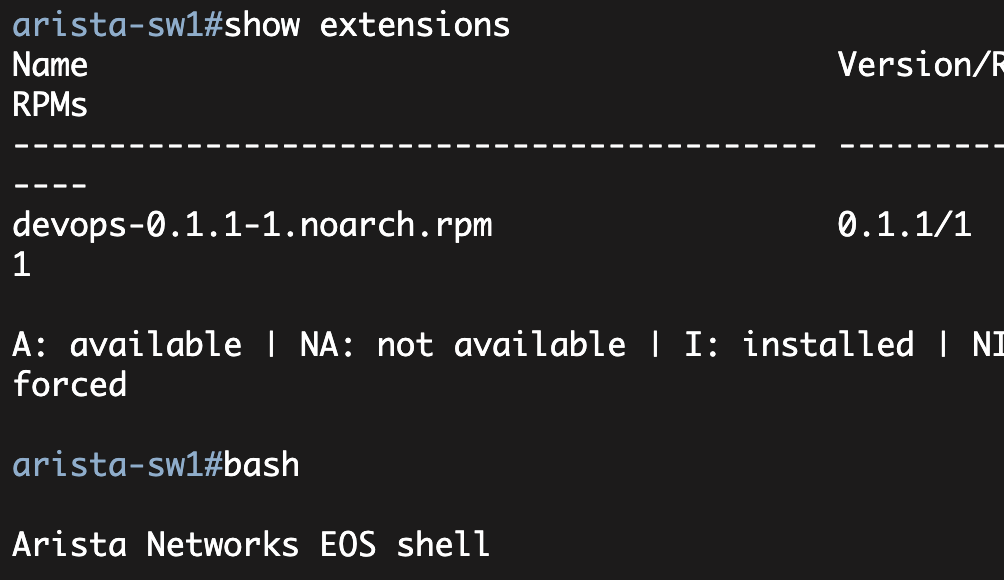
It (Ansible) uses SSH to transfer Arista-specific Python modules from the Ansible server to the switch. It then executes the Python modules on the switch (Arista has Python installed). The modules in turn execute a set of 'devops' commands; these 'devops' commands are provided by the Arista Devops Extension (you can also manually execute these devops commands from the switch's UNIX shell). The devops commands then make JSON-RPC calls into the Arista API.
To get started let's use the Ansible '-vvvv' option to see the actions that Ansible is taking during playbook execution.
$ ansible-playbook -vvvv interface.yml --module-path=../modules/

PLAY [arista] *****************************************************************

GATHERING FACTS ***************************************************************
<172.16.64.11> ESTABLISH CONNECTION FOR USER: ansible on PORT 22 TO 172.16.64.11
<172.16.64.11> EXEC /bin/sh -c 'mkdir -p $HOME/.ansible/tmp/ansible-1390770302.71-60440912756689 && chmod a+rx $HOME/.ansible/tmp/ansible-1390770302.71-60440912756689 && echo $HOME/.ansible/tmp/ansible-1390770302.71-60440912756689'
<172.16.64.11> REMOTE_MODULE setup
<172.16.64.11> PUT /tmp/tmpT8bZ45 TO /home/ansible/.ansible/tmp/ansible-1390770302.71-60440912756689/setup
<172.16.64.11> EXEC /bin/sh -c '/usr/bin/python /home/ansible/.ansible/tmp/ansible-1390770302.71-60440912756689/setup; rm -rf /home/ansible/.ansible/tmp/ansible-1390770302.71-60440912756689/ >/dev/null 2>&1'
ok: [arista-sw1]

TASK: [enable interface Ethernet 1-4] *****************************************
<172.16.64.11> ESTABLISH CONNECTION FOR USER: ansible on PORT 22 TO 172.16.64.11
<172.16.64.11> EXEC /bin/sh -c 'mkdir -p $HOME/.ansible/tmp/ansible-1390770304.33-2271384402544 && chmod a+rx $HOME/.ansible/tmp/ansible-1390770304.33-2271384402544 && echo $HOME/.ansible/tmp/ansible-1390770304.33-2271384402544'
<172.16.64.11> REMOTE_MODULE arista_interface interface_id=Ethernet1 admin=up
<172.16.64.11> PUT /tmp/tmpSuWBtC TO /home/ansible/.ansible/tmp/ansible-1390770304.33-2271384402544/arista_interface
<172.16.64.11> EXEC /bin/sh -c '/usr/bin/python /home/ansible/.ansible/tmp/ansible-1390770304.33-2271384402544/arista_interface; rm -rf /home/ansible/.ansible/tmp/ansible-1390770304.33-2271384402544/ >/dev/null 2>&1'
ok: [arista-sw1] => (item=Ethernet1) => {"changed": false, "item": "Ethernet1"}

...

PLAY RECAP ********************************************************************
arista-sw1                 : ok=3    changed=0    unreachable=0    failed=0
Note, I removed some of the output from the above (as it was pretty lengthy).
Looking at the section starting with 'TASK: [enable interface Ethernet 1-4]'—this section clearly shows you that Ansible is SSH'ing into the remote switch (172.16.64.11), creating a temporary directory, transferring over the Ansible 'arista_interface' module, executing it, and removing it.
In addition to the -vvvv option, you can also tell Ansible to leave the modules on the remote system using the 'ANSIBLE_KEEP_REMOTE_FILES'. This can be very helpful when troubleshooting as you can then login to the remote system and manually modify and execute the Ansible modules.
$ ANSIBLE_KEEP_REMOTE_FILES=1 ansible-playbook interface.yml --module-path=../modules/
PLAY [arista] *****************************************************************
GATHERING FACTS ***************************************************************
ok: [arista-sw1]
TASK: [enable interface Ethernet 1-4] *****************************************
ok: [arista-sw1] => (item=Ethernet1)
ok: [arista-sw1] => (item=Ethernet2)
ok: [arista-sw1] => (item=Ethernet3)
ok: [arista-sw1] => (item=Ethernet4)
TASK: [set description on Ethernet 1] *****************************************
ok: [arista-sw1]
PLAY RECAP ********************************************************************
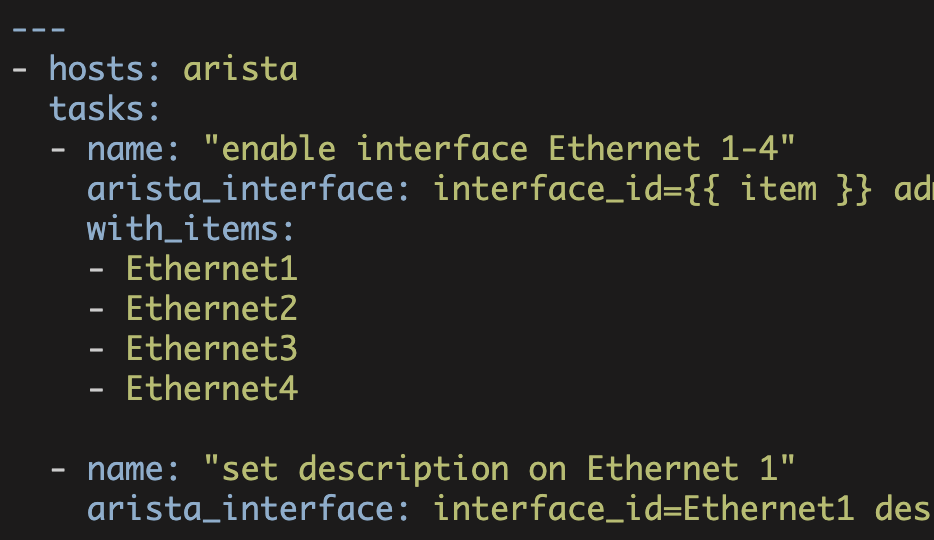
arista-sw1 : ok=3 changed=0 unreachable=0 failed=0In the above interface.yml playbook, I am ensuring the four interfaces on the Arista switch are enabled and I am configuring a description on interface Ethernet1 (see Part2 for a more detailed description).
Since I instructed Ansible to not remove the remote modules, I should now be able to login and look at the modules on the Arista switch.
$ ssh -l ansible 172.16.64.11
Password:
Last login: Sun Nov 24 12:22:47 2013 from 172.16.64.2

Arista Networks EOS shell

$ cd .ansible/
$ cd tmp/
$ ls -ltr
total 0
drwxrwxr-x 2 ansible ansible 60 Nov 24 12:44 ansible-1390763364.36-59664589193968
drwxrwxr-x 2 ansible ansible 60 Nov 24 12:44 ansible-1390763365.89-197189970370941
drwxrwxr-x 2 ansible ansible 60 Nov 24 12:44 ansible-1390763367.9-77873540917905
drwxrwxr-x 2 ansible ansible 60 Nov 24 12:44 ansible-1390763369.73-280540854380602
drwxrwxr-x 2 ansible ansible 60 Nov 24 12:44 ansible-1390763371.49-166753350694362
drwxrwxr-x 2 ansible ansible 60 Nov 24 12:44 ansible-1390763373.32-48484812964486
There will generally be several 'ansible' directories in .ansible/tmp/ since your playbook will typically have more than one action. You might have to analyze multiple files and directories to determine which module is relevant to your troubleshooting issue. Here I simply choose the last directory in the list.
I can now edit this file (this is the Ansible-Arista module).
$ cd ansible-1390763373.32-48484812964486/
$ ls
arista_interface
$ vi arista_interface
This file contains the module code and the command from my playbook that is being executed.
...
# == BEGIN DYNAMICALLY INSERTED CODE ==

MODULE_ARGS = "interface_id=Ethernet1 description='Test description'"
Here you see that this module will set the description on interface Ethernet1 to 'Test description'.
One other useful troubleshooting technique is to modify the Ansible-Arista module such that the 'devops' commands are printed out. Remember from the beginning of this article and from Part1 of this series that the Ansible-Arista modules execute a set of shell devops commands. These devops commands then connect back to the Arista eAPI using JSON-RPC (I know it is a bit convoluted).
So by modifying an Ansible-Arista module on the Arista switch, I can see the devops commands that are being executed. I can then manually execute these devops commands, if necessary.
Below I modify the 'run_command' method adding a 'print cmd' line (note, this is still in the vi session of the arista_interface module):
    def run_command(self, cmd):
        """ Calls the Ansible module run_command method. This method will
            directly return the results of the run_command method
        """
        self.log('command: %s' % cmd)
        print cmd
        return self.module.run_command(shlex.split(cmd))
If I then manually execute the Arista-Ansible module (note, I am still on the Arista switch here), I can then see the devops command that was executed.
$ python arista_interface
devops interface show Ethernet1
{"changed": false}
So 'devops interface show Ethernet1' was executed and since the interface description on the switch was already set correctly, nothing was changed.
Now what happens if I manually clear this Ethernet1 description on the switch and run the devops command again:
[ARISTA CLI]
arista-sw1#show run interfaces ethernet 1
interface Ethernet1
   description Test description
arista-sw1#conf t
arista-sw1(config)#int et
arista-sw1(config)#int ethernet 1
arista-sw1(config-if-Et1)#no desc
arista-sw1(config-if-Et1)#end

[ARISTA BASH SHELL]
$ python arista_interface
devops interface show Ethernet1
devops interface show Ethernet1
devops interface edit Ethernet1 --description 'Test description'
{"results": {"duplex": "full", "description": "Test description", "admin": "up", "mtu": 9214, "speed": "10g", "interface_id": "Ethernet1"}, "changed": true}
So, now I see that a set of devops commands are executed—two show commands and a command that sets the interface description. At this point the interface description will be set on the switch.
arista-sw1#show run interfaces ethernet 1
interface Ethernet1
   description Test description
arista-sw1#
Now what if I manually execute some of these devops commands? Here I manually execute the command that shows that state of Ethernet1.
$ devops interface show Ethernet1
{
    "message": "OK",
    "result": {
        "admin": "up",
        "description": "Test description",
        "duplex": "full",
        "interface_id": "Ethernet1",
        "mtu": 9214,
        "speed": "10g"
    },
    "status": 200
}
Notice that the output is in JSON.
Or if I execute the 'interface edit' command:
$ devops interface edit Ethernet1 --description 'Test description'
{
    "message": "OK",
    "result": {
        "admin": "up",
        "description": "Test description",
        "duplex": "full",
        "interface_id": "Ethernet1",
        "mtu": 9214,
        "speed": "10g"
    },
    "status": 200
}
This is the end of my three part series on using Ansible to configure Arista switches. I hope you found it interesting.
Kirk Byers
You might also be interested in:
-
Ansible
Configuring Arista Switches with Ansible (Part1)
I recently created a Meetup group in San Francisco named 'SF Network Automation'and gave the initial talk on, 'Network Automation using Ansible and Puppet'.
-
Ansible
Configuring Arista Switches with Ansible (Part2)
Last week I walked you through preparing an Arista switch for use with Ansible.
-
Ansible
Arista and Ansible using pyeapi
Arista recently created a library called pyeapi and they have integrated this library into their Ansible modules. pyeapi itself is fairly staightforward to use.