Python, Paramiko SSH,
and Network Devices
You have been learning Python—but as a network engineer what can you do with it?
In this article, I will show you how to use Paramiko SSH (a Python SSH library) to connect to and gather information from a router.
Now I will be using Python to connect to an interface that is inherently expecting a human being (i.e. using an 'Expect-like' method). For various reasons, this Expect-like method is problematic—for example, there can be timing issues; there can be unexpected interaction problems; and there can be variations in device output (between OS versions, between device models, between device types, etc.).
While this Expect-like method is problematic, in many cases, it is a reasonable option for automation of existing equipment (given currently available alternatives). This will change across time as newer APIs (and other management/control mechanisms) become available and as devices in the field get refreshed and upgraded. In my opinion, the difficulties of using Expect-like mechanisms are also overstated (don't get me wrong there are a lot of difficulties, but APIs are not all a bed of roses either).
As with many things, a Python SSH 'Expect-like' method can be made to work in a reasonable way provided that you know its limitations; you test it appropriately; and you take appropriate precautions when using it.
One final warning—and this is a warning about network automation in general. Programmatically controlling a set of network devices is a powerful capability and because it is powerful the stakes are significantly increased. You potentially might be changing fifty devices instead of one; you could be changing devices in multiple geographies. The consequences of mistakes are greatly increased. Consequently, start small. Start with show commands instead of configuration changes. When making changes practice good operational procedures—know what you are doing; test it out appropriately in a test environment; deploy the change to a single device; expand it to a small set of devices; consider the consequences if things go wrong and how you will correct them; determine whether this change is something that makes sense to do programmatically.
So on that warm and fuzzy note, let's dive-in.
So how can you SSH into routers using Python? The first step is to get the Paramiko SSH library installed. In my environment (AWS using AWS Linux AMI '2013.09.2' 64-bit), the installation process is easy—Paramiko is already installed.
If you are using Mac OS and you want to install Paramiko locally, then you will need a c-compiler. Consequently you will need to download Xcode (or you will need to install the Command Line Tools). This link provides some details http://osxdaily.com/2012/07/10/how-to-install-paramiko-and-pycrypto-in-mac-os-x-the-easy-way/. Note, the Xcode download is very large.
If you are using Windows, then you will need to get Python installed first. Once Python is installed, there are links that you can find online for installing Paramiko. You might want to just run a Linux virtual machine, however.
For other Linux distributions/builds—if Paramiko is not available via YUM or APT, you can probably use pip or easy_install to get Paramiko installed.
Now that Paramiko is installed, let's test that it works:
[root@ ec2-user]# python
Python 2.6.9 (unknown, Oct 29 2013, 19:58:13)
[GCC 4.6.3 20120306 (Red Hat 4.6.3-2)] on linux2
Type "help", "copyright", "credits" or "license" for more information.
>>> import paramiko
>>>
Note, on my AWS box, I received two warnings from the PyCrypto package when importing Paramiko (Paramiko uses the PyCrypto package). The first warning pertained to RandomPool; my research indicated that Paramiko had probably worked around this issue. The second warning pertained to a 'timing attack vulnerability' and needing libgmp5 or greater, I had considerable trouble finding additional useful information on this warning. I have currently commented out these two warnings in my test environment; you will have to decide what to do about these warnings in your environment.
Okay the Paramiko library is importing, but how do you connect to a router?
[root@ ec2-user]# python
Python 2.6.9 (unknown, Oct 29 2013, 19:58:13)
[GCC 4.6.3 20120306 (Red Hat 4.6.3-2)] on linux2
Type "help", "copyright", "credits" or "license" for more information.
>>>
>>> import paramiko
>>>
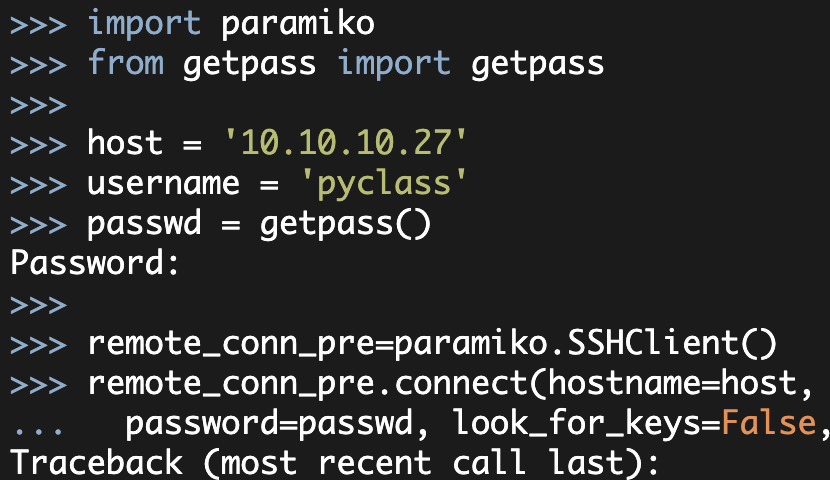
>>> ip = '1.1.1.16'
>>> username = 'testuser'
>>> password = 'password'
>>>
>>> remote_conn_pre=paramiko.SSHClient()
>>> remote_conn_pre
<paramiko.SSHClient object at 0x15f47d0>
>>>
>>> remote_conn_pre.set_missing_host_key_policy(
... paramiko.AutoAddPolicy())
>>>
>>> remote_conn_pre.connect(ip, username=username, password=password, look_for_keys=False, allow_agent=False)
>>>Note, in the examples in this article, I generally modified the IP addresses and always modified the password. I also added the look_for_keys and allow_agent arguments after the fact (with testing). Both look_for_keys and allow_agent pertain to using SSH keys and can cause problems with password authentication (if not disabled).
So what just happened here? First, I imported the Paramiko library; then I initialized a few variables. After the variables were initialized, then I created a Paramiko SSHClient object. Paramiko describes the SSHClient class as, "A high-level representation of a session with an SSH server". After the SSHClient object is created, I then set the SSH host key policy to automatically add the SSH host key—note, this is a security issue and makes you potentially vulnerable to man-in-the-middle attacks so make sure that this is appropriate for your environment. This was fine in my test environment.
At this point, I am ready to connect using the SSH 'connect' method passing in the ip, username, and password variables. If everything went well I should have an established SSH session. Let's check 'netstat':
# netstat -an | grep 22
tcp  0  0   0.0.0.0:22	        0.0.0.0:*	LISTEN
tcp  0  0   10.10.10.22:55566   1.1.1.16:22	ESTABLISHED
There is the session. Now let's start an 'interactive shell' with the router using the Paramiko invoke_shell() method.
>>> remote_conn = remote_conn_pre.invoke_shell() Now if everything worked right, we should be able to communicate with the router. Let's try to read from the SSH channel and see what is there:
>>> output = remote_conn.recv(1000)
>>> print output

twb-sf-881>
>>>
Here I read up to 1000 bytes from the channel (the maximum of 1000 bytes or whatever is currently available in the buffer). I then print the output. There is my router prompt, 'twb-sf-881>'.
Now what if we try to send a command through the channel:
>>>
>>> remote_conn.send("show ip int brief\n")
18
>>> output = remote_conn.recv(5000)
>>> print output
show ip int brief
Interface	IP-Address	OK?	Method	Status	Protocol
FastEthernet0
unassigned
YES	unset	up	up
FastEthernet1	unassigned	YES	unset	up	up
FastEthernet2	unassigned	YES	unset	down	down
FastEthernet3	unassigned	YES	unset	up	up
FastEthernet4	1.1.1.16	YES	NVRAM	up	up
NVI0	1.1.1.16	YES	unset	up	up
Tunnel1	169.254.253.2	YES	NVRAM	up	down
Tunnel2	169.254.253.6	YES	NVRAM	up	down
Vlan1	unassigned	YES	NVRAM	down	down
Vlan10	10.2.8.1	YES	NVRAM	up	up
Vlan20	192.168.0.1	YES	NVRAM	down	down
--More--
Here, I sent the 'show ip int brief' command down the channel. Notice, I added a newline character to the end of the command (i.e. I emulated hitting 'enter' on the line that was presented to the router). The '18' displayed after the send command is just the number of bytes I sent down the channel. I then read the buffer to see the output. This time I increased the buffer size to 5000 bytes to make sure I received all of the output data. I then print the output.
So, we are able to connect to the router, read from the session, and send a command to the router. Now we are doing all of this via the interactive shell. Let's convert this over to a basic Python program so we can better reuse our work.
import paramiko
import time


def disable_paging(remote_conn):
    '''Disable paging on a Cisco router'''

    remote_conn.send("terminal length 0\n")
    time.sleep(1)

    # Clear the buffer on the screen
    output = remote_conn.recv(1000)

    return output


if __name__ == '__main__':


    # VARIABLES THAT NEED CHANGED
    ip = '1.1.1.16'
    username = 'testuser'
    password = 'password'

    # Create instance of SSHClient object
    remote_conn_pre = paramiko.SSHClient()

    # Automatically add untrusted hosts (make sure okay for security
    # policy in your environment)
    remote_conn_pre.set_missing_host_key_policy(
         paramiko.AutoAddPolicy()
    )

    # initiate SSH connection
    remote_conn_pre.connect(
        ip,
        username=username,
        password=password,
        look_for_keys=False,
        allow_agent=False
    )
    print "SSH connection established to %s" % ip

    # Use invoke_shell to establish an 'interactive session'
    remote_conn = remote_conn_pre.invoke_shell()
    print "Interactive SSH session established"

    # Strip the initial router prompt
    output = remote_conn.recv(1000)

    # See what we have
    print output

    # Turn off paging
    disable_paging(remote_conn)

    # Now let's try to send the router a command
    remote_conn.send("\n")
    remote_conn.send("show ip int brief\n")

    # Wait for the command to complete
    time.sleep(2)

    output = remote_conn.recv(5000)
    print output
Now this is similar to what we did in the interactive session except I added some print statements to indicate what is occurring when the program runs. Additionally, I created a function to disable_paging (i.e. the --More-- prompt). I also added a small delay to the program (after sending the 'show ip int brief\n' command and before reading the buffer). This is required because if you send the command and then immediately read the buffer the router likely would not have responded yet or may have only partially responded. You can test removing the sleep on your own—when I tested it I got an exception because the data buffer was empty. One other minor tweak that I made was to send a newline character before sending the 'show ip int brief' command. This is just for formatting of the output (so the router prompt shows up in the output in a way we expect).
Okay, let's see what happens when I run the script:
# python test-ssh.py
SSH connection established to 1.1.1.16
Interactive SSH session established

twb-sf-881>

twb-sf-881>show ip int brief
Interface	IP-Address	OK?	Method	Status	Protocol
FastEthernet0
unassigned
YES	unset	up	up
FastEthernet1	unassigned	YES	unset	up	up
FastEthernet2	unassigned	YES	unset	down	down
FastEthernet3	unassigned	YES	unset	up	up
FastEthernet4	1.1.1.16	YES	NVRAM	up	up
NVI0	1.1.1.16	YES	unset	up	up
Tunnel1	169.254.253.2	YES	NVRAM	up	down
Tunnel2	169.254.253.6	YES	NVRAM	up	down
Vlan1	unassigned	YES	NVRAM	down	down
Vlan10	10.2.8.1	YES	NVRAM	up	up
Vlan20	192.168.0.1	YES	NVRAM	down	down
Vlan100	10.2.4.1	YES	NVRAM	up	up
twb-sf-881>
Notice, the '--More--' paging is gone.
Hopefully, this demonstrates that it is not too hard to integrate Python to a router using an SSH "Expect-like" method.
Additionally, hopefully, you can start to see the potential in doing this or similar things to gather information and to make changes to a set of network devices.
Kirk Byers
You might also be interested in:
-
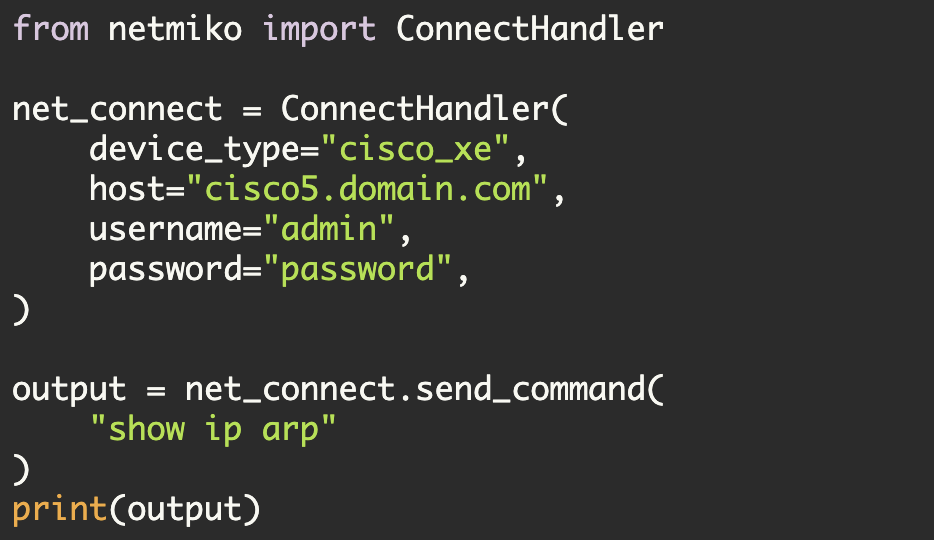
Netmiko
Netmiko Library
Since late 2014, I have been working on an open-source Python library that simplifies SSH management to network devices.
-
Paramiko
Paramiko and Validating SSH Host Keys
The above code causes Paramiko to blindly accept the SSH host key from the remote device. Conseqently, this makes you vulnerable to a man-in-the-middle attack.
-
Python
Parsing Hierarchical Configurations with ciscoconfparse
There is a Python library named ciscoconfparse that helps you parse Cisco hierarchical configurations. This would include other vendors that are Cisco-like (i.e.