NETCONF: Abstract the Abstractions
In a recent article, I described how to use NETCONF to configure a loopback interface on a Cisco IOS-XE route. In this article, I also used the IOS-XE NETCONF Candidate Configuration Feature.
As I mentioned in that article, the shown solution had several problems including: 1) there was no validation, 2) there was no locking of the configuration, 3) there was no saving the configuration to startup-config, and 4) finally the XML configuration was hard-coded to a particular interface.Let's start working on these issues. In particular, let's eliminate the hard-coding of the XML configuration to a particular loopback interface.
Abstract the Abstractions
Now I want to keep the XML configuration file in an external file and we want to abstract away the hard-coding of the loopback to a particular interface number.
If we look at our previous loopback_cfg.xml file and find all the occurrences of the loopback interface number we see the following:
$ grep 99 loopback_cfg.xml
        <name>99</name>
      <name>Loopback99</name>
        <name>Loopback99</name>
      <name>Loopback99</name>
Thus we have four occurrences of the loopback number. Let's convert this loopback_cfg.xml file over to a Jinja2 file and replace the loopback number with a variable.
Jinja2 Glue-Code
The place to start here is to first convert the Jinja2 file over to a Jinja2 template, but with the file completely unchanged. In other words, the file contains ZERO Jinja2 variables and ZERO Jinja2 control structures.
Below we will add the Python Jinja2 glue-code to our program. This glue-code will properly render this template. Thus at the end of this, we will have recreated our XML, but from the Jinja2 template.
So what does the Python Jinja2 glue-code look like:
from jinja2 import FileSystemLoader, StrictUndefined
from jinja2.environment import Environment
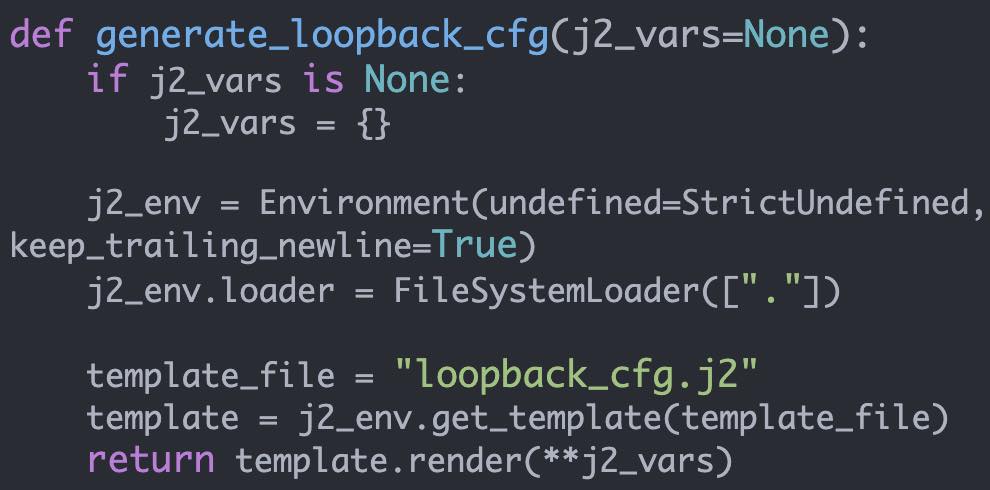
def generate_loopback_cfg(j2_vars=None):
if j2_vars is None:
j2_vars = {}
j2_env = Environment(
undefined=StrictUndefined,
keep_trailing_newline=True
)
j2_env.loader = FileSystemLoader(["."])
template_file = "loopback_cfg.j2"
template = j2_env.get_template(template_file)
return template.render(**j2_vars) We have a couple of Jinja2 imports.
We then create a function that receives Jinja2 input variables (variables that we will ultimately embed inside of our template).
One of the first things we do in this function is create a Jinja2 environment object. You can think of the Jinja2 environment as a way of specifying how the Jinja2 rendering should take place.
In this Jinja2 environment we set a few characteristics of the environment namely we force any undefined variables to generate an exception (StrictUndefined). We also specify where we are going to look for templates (FileSystemLoader). Finally, we add an argument to change a very minor aspect related to whitespace (keep_trailing_newline=True).
At the end of our function, we point to our Jinja2 template and tell Jinja2 to render it:
    template_file = "loopback_cfg.j2"
    template = j2_env.get_template(template_file)
    return template.render(**j2_vars)
If this all worked properly we should exactly generate our original XML file. So let's write the generated content out to a file and compare the before and after.
xml_content = generate_loopback_cfg()

filename = "loopback_cfg.xml"
with open(filename, "w") as f:
    f.write(xml_content)
$ diff loopback_cfg.xml loopback_cfg.j2
$ So the two files are identical.
Jinja2 Variables
Now that we have a working Jinja2 structure, let's expand upon it.
In particular, let's make variables out of all references to the hard-coded loopback number.
Consequently, we add the following into our Jinja2 template (replacing all of the "99" loopback number references).
        <name>{{ loopback_number }}</name>
      <name>Loopback{{ loopback_number }}</name>
        <name>Loopback{{ loopback_number }}</name>
      <name>Loopback{{ loopback_number }}</name>
We should now be able to generate our XML file using this "{{ loopback_number }}" variable and create the exact same XML file that we had previously.
loopback_vars = {"loopback_number": "99"}
xml_content = generate_loopback_cfg(loopback_vars)

filename = "loopback_cfg.xml"
with open(filename, "w") as f:
    f.write(xml_content)
$ python cfg_loopback.py
$ diff loopback_cfg.xml loopback_cfg.xml.bup
$ Putting it All Together
Now that we have the Jinja2 working, we should be able to generate the XML corresponding to any loopback number. Additionally, using the code from part1 we should be able to push this configuration to our Cisco IOS-XE device and commit the change into our running configuration.
import os
from lxml import etree # noqa
from ncclient import manager
from rich import print
import pdbr # noqa
from jinja2 import FileSystemLoader, StrictUndefined
from jinja2.environment import Environment
def generate_loopback_cfg(j2_vars=None):
if j2_vars is None:
j2_vars = {}
j2_env = Environment(
undefined=StrictUndefined,
keep_trailing_newline=True
)
j2_env.loader = FileSystemLoader(["."])
template_file = "loopback_cfg.j2"
template = j2_env.get_template(template_file)
return template.render(**j2_vars)
def save_xml(filename, xml_content):
with open(filename, "w") as f:
f.write(xml_content)
if __name__ == "__main__":
device = {
"host": "3.85.14.166",
"port": 830,
"username": "pyclass",
"password": "bogus",
"hostkey_verify": False,
}
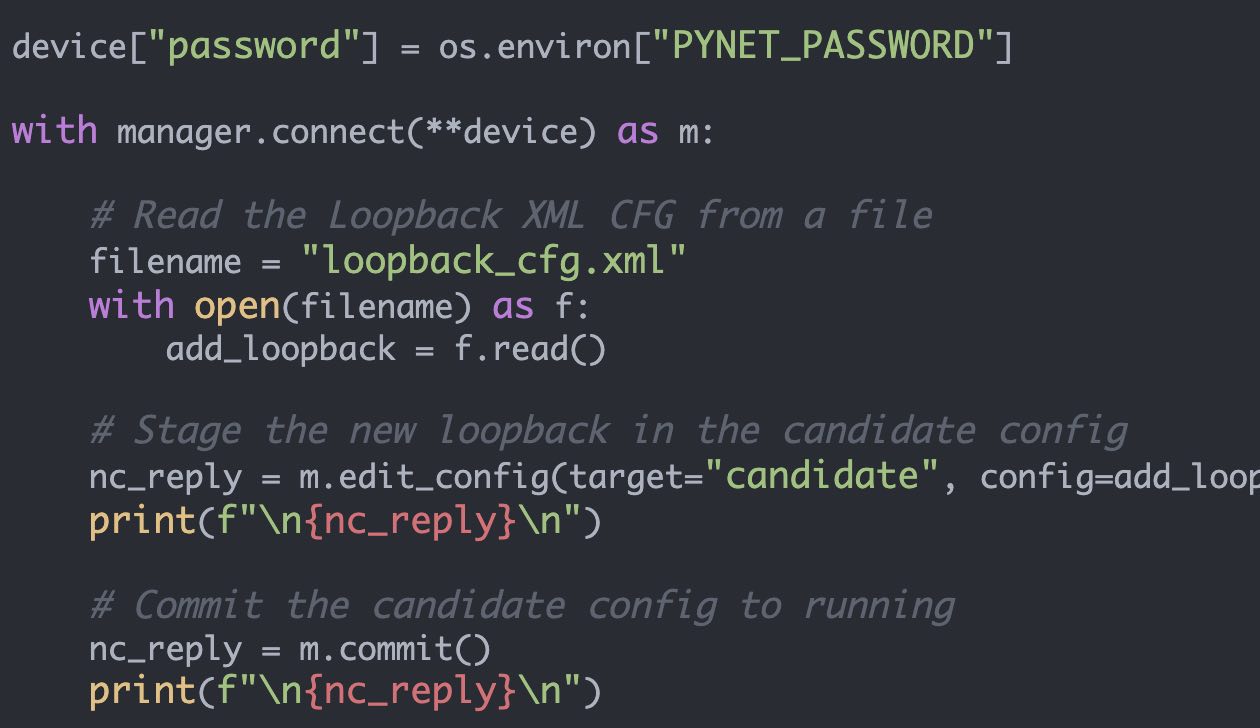
device["password"] = os.environ["PYNET_PASSWORD"]
with manager.connect(**device) as m:
# Generate XML
loopback_vars = {"loopback_number": "1"}
xml_content = generate_loopback_cfg(loopback_vars)
add_loopback = xml_content
# Save out to a file (so we have a record of the config)
save_xml("loopback_cfg.xml", xml_content)
# Stage the new loopback configuration
nc_reply = m.edit_config(target="candidate", config=add_loopback)
print(f"\n{nc_reply}\n")
# Commit the candidate configuration to running config.
nc_reply = m.commit()
print(f"\n{nc_reply}\n") And executing this yields:
$ netmiko-show --cmd "show ip int brief" cisco7
Interface              IP-Address      OK? Method Status                Protocol
GigabitEthernet1       172.26.1.41     YES DHCP   up                    up
VirtualPortGroup0      192.168.35.101  YES other  up                    up
$ python cfg_loopback.py
<?xml version="1.0" encoding="UTF-8"?>
<rpc-reply
xmlns="urn:ietf:params:xml:ns:netconf:base:1.0"
message-id="urn:uuid:a54bb466-193d-4022-8744-3515719bd293"
xmlns:nc="urn:ietf:params:xml:ns:netconf:base:1.0">
<ok/>
</rpc-reply>
<?xml version="1.0" encoding="UTF-8"?>
<rpc-reply
xmlns="urn:ietf:params:xml:ns:netconf:base:1.0"
message-id="urn:uuid:ba8f77f9-0297-4acb-abbd-513342f4a5d0"
xmlns:nc="urn:ietf:params:xml:ns:netconf:base:1.0">
<ok/>
</rpc-reply> $ netmiko-show --cmd "show ip int brief" cisco7
Interface IP-Address OK? Method Status Protocol
GigabitEthernet1 172.26.1.41 YES DHCP up up
Loopback1 unassigned YES unset up up
VirtualPortGroup0 192.168.35.101 YES other up up And there it is, our nice, little Loopback1 interface.
Reference Code
Reference code used in this article can be found here
Kirk Byers
You might also be interested in:
-
NETCONF
IOS-XE and NETCONF Candidate Configuration Testing, Part1
At some point in the relatively recent past, Cisco added candidate configuration support into Cisco's IOS-XE NETCONF implementation.
-
Netmiko
Netmiko4: ConnLogOnly
ConnLogOnly is a replacement for ConnectHandler and operates similarly.
-
Netmiko
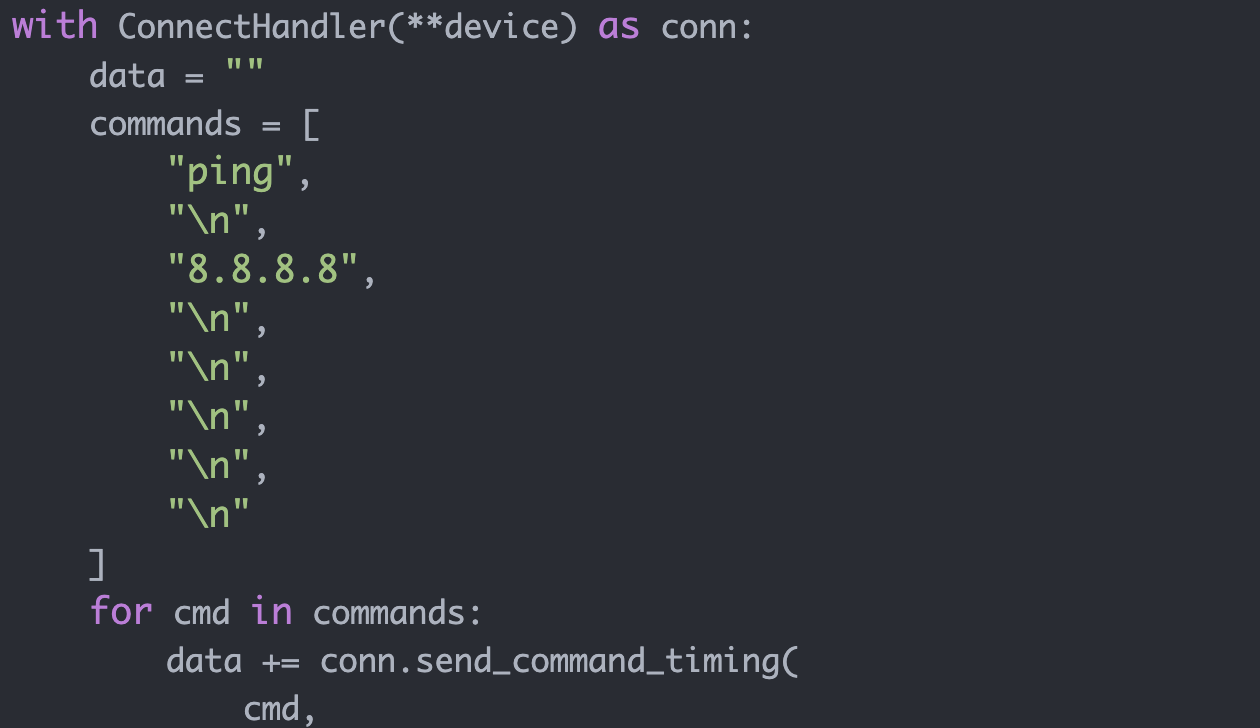
Netmiko4: send_command_timing
Netmiko has two fundamental ways for gathering show output: send_command() and send_command_timing(). send_command_timing() is an entirely timing based solution.